Wednesday, September 4, 2013

Another Wedding Keepsake


Wedding Bouquet Ornaments

You've been asked to stand by your friend's side on her special day, what greater honor?  You've been there for the ceremony and vows, and you've partied at the reception.  You've had the time of your life.  The next day, what do you have to remember the special occasion (besides the pictures and memories)?  Perhaps a hangover, a wrinkled dress, a disheveled hair style, and your beautiful flowers.  The bouquet will not look great forever, so why not try to preserve it... somewhat... and use the use some parts to make an ornament?!  Both of my daughters were in their friend's wedding and I decided to try and save their bouquets.
First I hung the bouquets upside down to dry them out as much as possible.  Then I took it apart and added some of the elements, petals and buds to a glass Christmas ornament.  For the roses, I removed several of the outer petals until I was able to *squish* the remaining rose into the opening of the ornament.


As I did in the Wedding Invitation Ornament, I included the beads on the filament to add interest and another dimension to the ornament.  Again, I used the eraser end of a pencil to move the elements around to my liking.   Once the ornament was full, to complete the project, I added a coordinating bow that was similar to their dress color.  


I don't know how this will hold up, the flower may dry out even more and crumble and fall to the bottom of the ornament, but I'm hoping for the best!!  Stay tuned...

So, my hope is, when the dress no longer fits and is out of style and when other weddings, babies and other life events put time and distance between this wedding they will always have this ornament and every Christmas will be reminded of this special occasion and their friend!


btw... the pictures honestly don't these justice.  They are really very pretty!

Tuesday, September 3, 2013

Wedding Invitation Ornament


A wedding, a marriage, a lifetime of happiness and a keepsake!

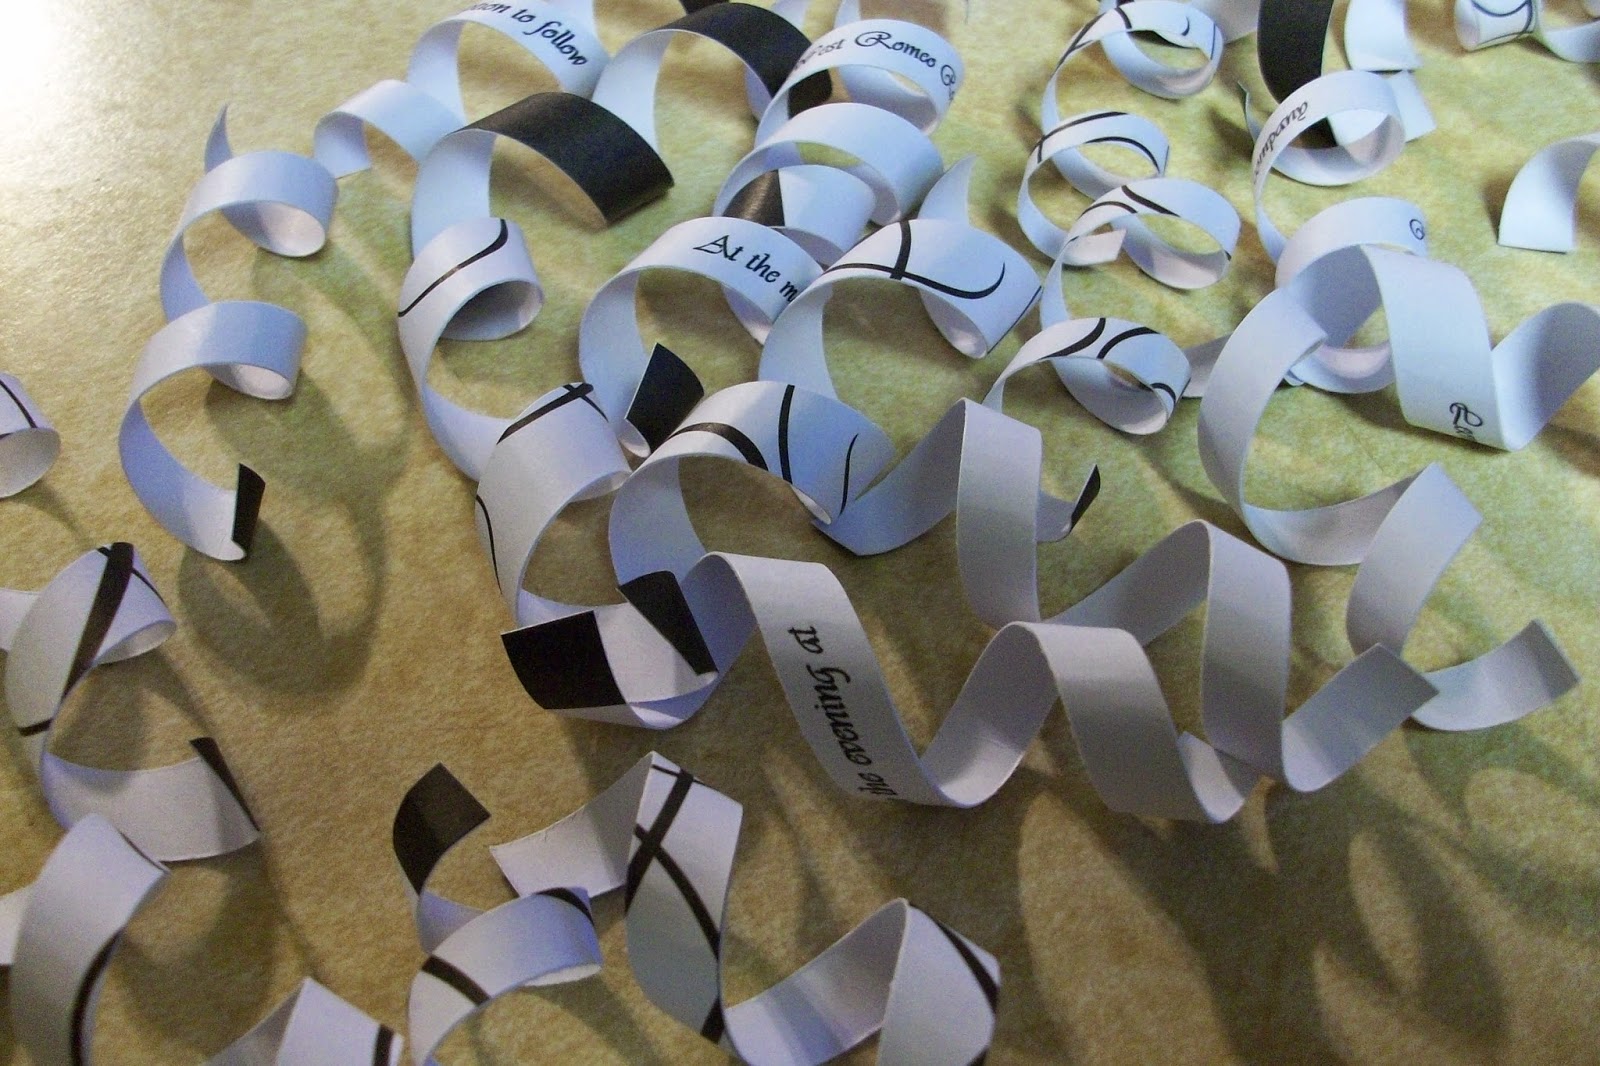
When I had seen this gift idea here I knew that I wanted to try recreating it!  Once I had received the invitation in the mail I took care to make sure that it stayed pristine and even took my daughters invitation as well so I would have a back-up, you know... just in case!!  I then cut the invitation into strips making sure the lines of text were centered on the strips.  I didn't bother to measure and in fact used varying widths.  Other necessities would include a glass Christmas ball, I used a 4" diameter ornament for mine, and any other items desired to embellish the ornament.


I found these in the floral section at Michaels.  I'm not sure what you call them, but I loved the glass beads on the filament and thought that would add some interest as well as pick up the lights from the tree.  I also felt that these would be better than loose beads which would fall to the bottom of the ornament.


Coordinating ribbon was all that was left to finish off this project. 


I then used a pencil to curl the strips of the invitation.


The strips were then dropped into the ornament along with segments of the beads.  I used the eraser end of a pencil to gently move items around until I liked the way it looked... which could have been a moot point as I'm sure the items will shift and change position whenever the ornament is moved :).


This close up allows you to see that the beads as well as get 
a glimpse of the text on the strips of the invitation.

All that's left is to box it up and present the bride with her keepsake ornament!


Sunday, August 18, 2013

Two for One!

When life gives you lemons...  clean your microwave and garbage disposal!!  


I had seen several people post this suggestion on Pinterest and knew I would have to try it.  To tell the truth, I was skeptical as I have always dreaded cleaning the microwave.  It's always a caked on, tough to remove mess.  Not anymore.  I was completely amazed at how easy this was!  If you have a dirty microwave you really must try this!!  

All I did was juiced 2 lemons and cut up the remains and added to approximately 1 cup of water.  Heat in the microwave on high for 5 - 10 minutes (it only took 5 minutes for me).  Just enough to get the water with lemon to steam the inside of the microwave.

Next, just use a damp sponge and wipe out the mess.  It's that easy!!  No scrubbing needed.  It was a breeze!!  Honestly, I was blown away by how well this worked.


Last but not least, don't just toss your lemon remains in the trash, throw your lemon water and rinds down your garbage disposal to remove lingering odors.  I have to tell you, my hands and my kitchen smelled wonderfully clean and lemony!  :)


 Two jobs done for the price of two lemons.  Not bad!!


Sunday, June 9, 2013

Banana Muffins


I had several overripe bananas and promised myself that instead of just pitching them I would make something with them.  I found this Banana Muffin recipe on Pinterest and had to give it a try!

I found the recipe here.  
Here's what you'll need:  

Ingredients:
3 cups all-purpose flour
1 teaspoon baking soda
1 teaspoon salt
1/2 teaspoon baking powder
2 cups sugar
1 cup vegetable oil
3 large eggs
1 tablespoon vanilla extract
4 ripe bananas, peeled and coarsely mashed
Directions:
Line 18 muffin cups with paper liners. Preheat the oven to 325 degrees F.Whisk the flour, baking soda, salt, and baking powder in a medium bowl to blend. Beat the sugar, oil, eggs, and vanilla in a large bowl to blend. Stir in the banana. Add the dry ingredients and stir just until blended.
Divide the batter among the prepared muffin cups. Bake the muffins on the middle rack until the tops are golden brown and a tester inserted into the center comes out with no crumbs attached, about 25 minutes. Transfer the muffins to a rack and cool slightly.


Notes:  
~ I didn't have vegetable oil and used canola oil instead.  I suppose you can even substitute applesauce if you wish to be more health conscious.  
~ I also added approximately 2 - 2.5 tsp of cinnamon.  
~ I was able to get 24 muffins, instead of the 18 stated in the recipe, and could have probably had 2 more if I had another muffin pan.  I'm not sure why this happened unless the size of my 4 bananas was larger than what was used in the original recipe resulting making more batter.  Whatever the reason, I'm not complaining!  :)
~ After I filled one muffin pan I added mini chocolate chips to the remaining batter.  Mmmm...

These muffins are sooo good!  I think this recipe is a keeper!!

ENJOY!!


Monday, April 1, 2013

Paper-Napkin Decoupage Eggs


The idea started with Martha Stewart, I just took it a few steps further. 
 Check out Martha Stewart's complete directions here.  

The basic necessities are eggs, paper napkins (with a design of your choosing) and Mod Podge.  To take the eggs to the next level I included egg dye and glitter paint pens.

The first step is to blow out your eggs.


It would be a good idea to have extra eggs as you will likely have a few casualties.
The eggs colored and ready to decorate


Cut out the pieces of the napkin that you wish to use on your eggs.


You will need to have your eggs dyed ahead of time so they are 
perfectly dry before adhering the napkins pieces.


Use Mod Podge to adhere napkin pieces to your colored eggs.

Next you will use glitter paint pens to embellish your eggs.

The final step is to add a colorful ribbon at the top to hang your decorated eggs.


Happy Easter!!

Wednesday, December 26, 2012

Homemade Vanilla Extract


Bottomless Vanilla Extract

This Christmas several friends and family were recipients of homemade vanilla extract.  The recipe is simple... Vodka and split vanilla beans and a couple of months (for it to become vanilla-y).  What is great about this is that you may never have to buy vanilla extract again.  When the bottle starts to get low just add more vodka.  When it starts to lose the essence of vanilla just remove the old beans and add new split vanilla beans.  Simple!  

I found these great bottles at Specialty Bottle and the labels at myownlabels


I will be making more of these very soon!!

I hope everyone had a very Merry Christmas!!


Saturday, December 15, 2012

Crunchy Caramel Apple Pie


Crunchy Caramel Apple Pie

Filling

6 C - Apples, peeled and thinly sliced
1/2 C - Sugar
3 Tbls - Flour
1 tsp - Cinnamon
1/8 tsp - Salt

Crumb Topping

1 C - Brown Sugar
1/2 C - Flour
1/2 C - Quick Cooking Oats
1/2 C - Butter

Finishing Touch

1/2 C - Pecans, chopped
1/4 C - Caramel Topping

Plus Pastry for one pie


Prepare pastry for pie.  I use a Pillsbury Pie Crust, but if you prefer you can make your own pastry.  Line a 9" pie plate with pastry.  Trim and crimp edges as desired.


Prepare the crumb topping.  Stir together sugar, flour and oats.  Using a pastry blender, cut in butter until it resembles coarse crumbs.


In a large mixing bowl, stir together sugar, flour, cinnamon and salt.  Add apple slices and gently toss to coat.  Transfer apple mixture to pastry lined pie plate.


Sprinkle crumb topping over apple mixture.  


To prevent over-browning, cover edge of pie with foil.  Bake 25 minutes at 375.   Remove foil and bake an additional 25 - 30 minutes or until top is golden.  Remove from oven.  Sprinkle with pecans and drizzle with caramel topping.


Cool on wire rack.

Enjoy! 


This recipe is a family favorite.  I hope it becomes one of your favorites as well!!