Showing posts with label ornament. Show all posts

Saturday, December 6, 2014

Nail Polish Christmas Ornaments


When I saw these ornaments on Pinterest I knew I had to make them.  
Here is the tutorial that I used.

What you'll need are clear glass ornaments, available in several different sizes as well as shapes, (I got mine from Michael's), embellishments, ribbon and of course nail polish!  We chose mainly the glittery nail polish in festive Christmas-y colors. 

You'll need to remove the top and pour in the desired nail polish and begin to swirl the nail polish taking time to cover every bit of the ornament.


We also used clear glitter polish that we would swirl in the ornament first, once that dried we would go in with another opaque nail polish to create yet another look.


Below is the gallery of our creations:


We're pretty happy with the results!  
These ornaments now adorn our tree and will for many years to come!

Thursday, December 26, 2013

Christmas Ornament for a Special Event


Want to have a keepsake from a special event?  Make an ornament!  You might remember the wedding keepsake ornaments that I made earlier this year, this is a similar idea.  You can do this with any event that you want to remember (a concert, a trip to the zoo, a movie, a dinner date etc) as long as all the pieces are able to fit through the small opening in the top of the ornament.  

In this case, I went to a Matchbox Twenty/Goo Goo Dolls concert, that's nothing new as I've been to several Matchbox Twenty or Rob Thomas concerts, but this one was special and wanted to have something tangible to remember that night.  

Look closely and you'll see that I've included my ticket, parking pass, pictures from the program and other words and phrases from the program and ticket packet.  I stuffed all these into the ornament, along with some crystal beads (on filament) and finished it off with a ribbon and a couple heart charms.  It's perfect... for me!!  Check out the other views of the ornament below:


I will look forward to unwrapping this ornament and placing it on my tree for many years to come!

Merry Christmas!


Christmas Ornament In Memory of...


It's been almost one year since we lost our sweet Logan.  I wanted to have something in her memory for the Christmas tree and couldn't find any memorial ornaments that I liked.  I decided that I should try to make something.  This is what I came up with.  I liked it so much that I made 3 more, one for each of my kids to have for their Christmas trees.  


I found exactly what I was looking for at factorydirectcraft.com.  


I used this place card holder for the frame


         and these wings.


I took the backing off off the frame and removed the easel.  I adhered the wings to the backing with a good amount of hot glue.


Since it was going to be hanging by the wings I wanted to make sure that they were secure so I also used a heavy duty stapler and placed a staple or two right through the wings, glue and frame backing.

 Then I put her picture in the frame, slid the backing in place and put her front and center on the Christmas tree.


I know that for years to come when we decorate the tree it will bring back so many happy memories.

I hope you all had a very Merry Christmas!


Saturday, November 2, 2013

Wedding Invitation Ornament - take 2


Another wedding, another ornament!  :)  
This is the second wedding invitation ornament  that I've made.  See my original "how to" here. 


 Front
This invitation had a band that held all the different pieces of the invitation together.   A portion of this band made a perfect tag for the ornament as it had their initials and wedding date.

Back
Note the personalized details.

I hope the couple enjoys their wedding keepsake!


Wednesday, September 4, 2013

Another Wedding Keepsake


Wedding Bouquet Ornaments

You've been asked to stand by your friend's side on her special day, what greater honor?  You've been there for the ceremony and vows, and you've partied at the reception.  You've had the time of your life.  The next day, what do you have to remember the special occasion (besides the pictures and memories)?  Perhaps a hangover, a wrinkled dress, a disheveled hair style, and your beautiful flowers.  The bouquet will not look great forever, so why not try to preserve it... somewhat... and use the use some parts to make an ornament?!  Both of my daughters were in their friend's wedding and I decided to try and save their bouquets.
First I hung the bouquets upside down to dry them out as much as possible.  Then I took it apart and added some of the elements, petals and buds to a glass Christmas ornament.  For the roses, I removed several of the outer petals until I was able to *squish* the remaining rose into the opening of the ornament.


As I did in the Wedding Invitation Ornament, I included the beads on the filament to add interest and another dimension to the ornament.  Again, I used the eraser end of a pencil to move the elements around to my liking.   Once the ornament was full, to complete the project, I added a coordinating bow that was similar to their dress color.  


I don't know how this will hold up, the flower may dry out even more and crumble and fall to the bottom of the ornament, but I'm hoping for the best!!  Stay tuned...

So, my hope is, when the dress no longer fits and is out of style and when other weddings, babies and other life events put time and distance between this wedding they will always have this ornament and every Christmas will be reminded of this special occasion and their friend!


btw... the pictures honestly don't these justice.  They are really very pretty!

Tuesday, September 3, 2013

Wedding Invitation Ornament


A wedding, a marriage, a lifetime of happiness and a keepsake!

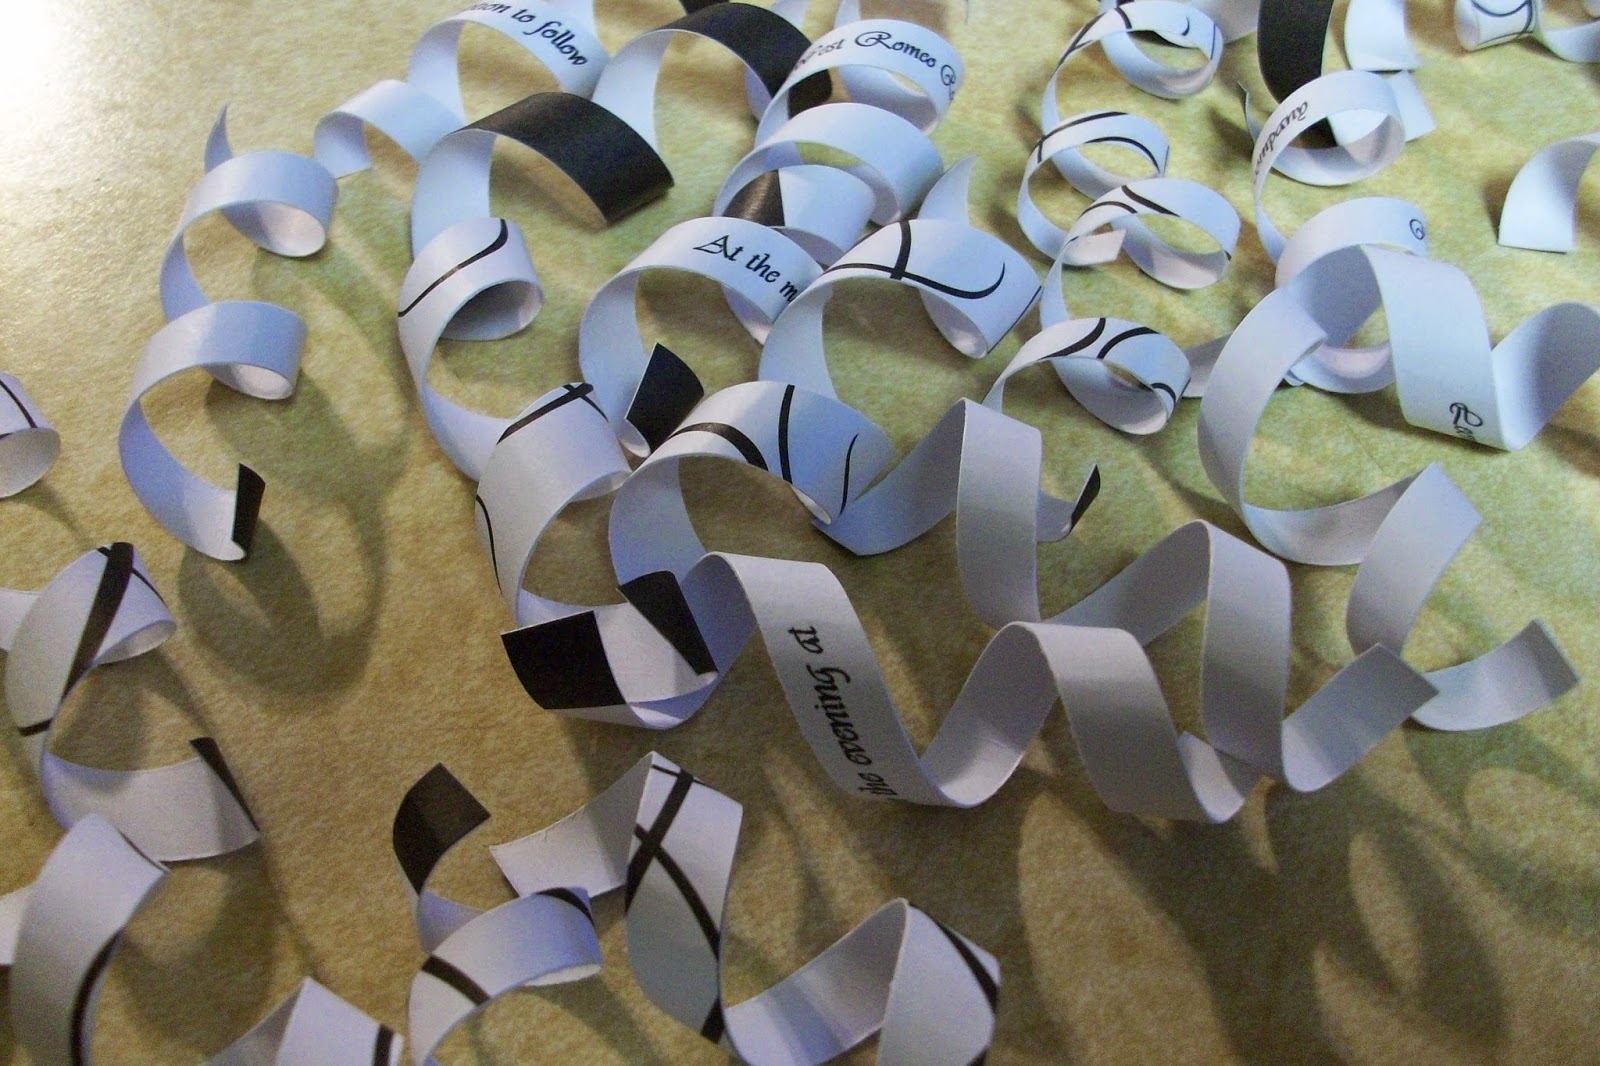
When I had seen this gift idea here I knew that I wanted to try recreating it!  Once I had received the invitation in the mail I took care to make sure that it stayed pristine and even took my daughters invitation as well so I would have a back-up, you know... just in case!!  I then cut the invitation into strips making sure the lines of text were centered on the strips.  I didn't bother to measure and in fact used varying widths.  Other necessities would include a glass Christmas ball, I used a 4" diameter ornament for mine, and any other items desired to embellish the ornament.


I found these in the floral section at Michaels.  I'm not sure what you call them, but I loved the glass beads on the filament and thought that would add some interest as well as pick up the lights from the tree.  I also felt that these would be better than loose beads which would fall to the bottom of the ornament.


Coordinating ribbon was all that was left to finish off this project. 


I then used a pencil to curl the strips of the invitation.


The strips were then dropped into the ornament along with segments of the beads.  I used the eraser end of a pencil to gently move items around until I liked the way it looked... which could have been a moot point as I'm sure the items will shift and change position whenever the ornament is moved :).


This close up allows you to see that the beads as well as get 
a glimpse of the text on the strips of the invitation.

All that's left is to box it up and present the bride with her keepsake ornament!