Thursday, December 26, 2013

Christmas Ornament for a Special Event


Want to have a keepsake from a special event?  Make an ornament!  You might remember the wedding keepsake ornaments that I made earlier this year, this is a similar idea.  You can do this with any event that you want to remember (a concert, a trip to the zoo, a movie, a dinner date etc) as long as all the pieces are able to fit through the small opening in the top of the ornament.  

In this case, I went to a Matchbox Twenty/Goo Goo Dolls concert, that's nothing new as I've been to several Matchbox Twenty or Rob Thomas concerts, but this one was special and wanted to have something tangible to remember that night.  

Look closely and you'll see that I've included my ticket, parking pass, pictures from the program and other words and phrases from the program and ticket packet.  I stuffed all these into the ornament, along with some crystal beads (on filament) and finished it off with a ribbon and a couple heart charms.  It's perfect... for me!!  Check out the other views of the ornament below:


I will look forward to unwrapping this ornament and placing it on my tree for many years to come!

Merry Christmas!


Christmas Ornament In Memory of...


It's been almost one year since we lost our sweet Logan.  I wanted to have something in her memory for the Christmas tree and couldn't find any memorial ornaments that I liked.  I decided that I should try to make something.  This is what I came up with.  I liked it so much that I made 3 more, one for each of my kids to have for their Christmas trees.  


I found exactly what I was looking for at factorydirectcraft.com.  


I used this place card holder for the frame


         and these wings.


I took the backing off off the frame and removed the easel.  I adhered the wings to the backing with a good amount of hot glue.


Since it was going to be hanging by the wings I wanted to make sure that they were secure so I also used a heavy duty stapler and placed a staple or two right through the wings, glue and frame backing.

 Then I put her picture in the frame, slid the backing in place and put her front and center on the Christmas tree.


I know that for years to come when we decorate the tree it will bring back so many happy memories.

I hope you all had a very Merry Christmas!


Saturday, November 9, 2013

Pumpkin and White Chocolate Cookies


More Pumpkin Cookies!
While looking for the perfect recipe, where else but on Pinterest, I found this recipe here.  Since I was already making the Caramel Frosted Pumpkin Cookies I was looking for another cookie recipe, but I wanted one that was quick and easy, and of course good, and this one fit the bill.  Let me let you in on a secret... this recipe uses only 3 ingredients.  Yes, you heard me right, only 3 ingredients. 

1 box of Spice Cake Mix
16 oz Pumpkin Puree
2 cups White Chocolate Chips
(divide chocolate into 2 - 1 cup portions, 1 cup for cookies and 1 cup for topping)

Here's what you do:
Preheat your oven to 350-degrees.
Mix your 3 ingredients together.
Drop on parchment or silicone sheet lined cookie sheet.
Bake at 350-degrees for 10-12 minutes.
 Once the cookies have cooled melt remaining white chocolate and drizzle over the cookies.


Pre-drizzle
Post drizzle

I hope you enjoy!  :)

Friday, November 8, 2013

Pumpkin Cookies with Caramel Icing


It's that time of year, pumpkin recipes all over pinterest.  I wanted to bake, and it had to be pumpkin.  I found these cookies and decided these were it... these were the ones I had to try. 
Gotta tell you, these cookies are pretty amazing!  
I found this recipe here.  Here's what you'll need:
For the Cookies
1 cup butter flavored shortening
1 cup unsalted butter; softened
2 cups sugar
2 cups canned pumpkin (solid; not pie mix)
2 eggs
2 teaspoons baking soda
3 teaspoons ground cinnamon
2 teaspoons pumpkin pie spice
1/2 teaspoon nutmeg
1 teaspoon salt
4 cups all-purpose flour
For the Caramel Frosting
6 tablespoons butter
8 tablespoons milk
1 cup packed brown sugar
2 cups confectioners’ sugar
1 1/2 teaspoons vanilla extract
  
Directions:

Cookies
1. Cream shortening, butter, white sugar and pumpkin. Add eggs and mix well.
2. Sift together the baking soda, ground cinnamon, pumpkin pie spice, nutmeg, salt and flour.
3. Add to pumpkin mixture and mix well.
4. Drop from spoon (or cookie scoop) to cookie sheet.
5. Bake 13-15 minutes at 350°F
6. Cool slightly on cookie sheet and transfer to cooling rack.  Cool completely before icing.

Caramel Frosting
1. Heat butter, milk, and brown sugar, over medium heat, until sugar is dissolved.
2. Cool and add confectioners’ sugar and vanilla, beat well.
3. Take cooled cookies and dip tops into frosting.
4. While frosting is still wet, sprinkle with fall-ish sprinkles or jimmies.


Sunday, November 3, 2013

Glazed Pumpkin Scones


I love all things pumpkin!  Well, that is all things SWEET and pumpkin.  Not sure why you'd waste perfectly good pumpkin and make ravioli out of it if there are scones to be had. 

I found this recipe on pinterest and knew immediately that I wanted to try it.  These scones are made with pumpkin and have not one, but two different glazes to top it off!  These scones were surpisingly moist, not typically characteristic of most scones, and really really delish!!  The recipe that I followed can be found here.

Let's get started.  You will need:

Scones
  • 2 cups all purpose flour
  • 1/4 cup plus 3 tablespoons granulated sugar
  • 1 TBSP baking powder
  • 1/2 tsp salt
  • 1/2 tsp ground cinnamon
  • 1/2 tsp ground nutmeg
  • 1/4 tsp ground cloves
  • 1/4 tsp ground ginger
  • 6 TBSP cold butter, cut into 1-inch cubes
  • 1/2 cup canned pumpkin (we used our fresh pumpkin puree)
  • 3 TBSP half-and-half
  • 1 large egg
Preheat oven to 425.
Line baking sheet with parchment paper or silicone baking sheet.  Whisk together pumpkin, half-and-half and egg.  Set aside.

Combine flour, sugar, baking powder, salt, cinnamon, nutmeg, cloves, and ginger. Mix well.
Add cubed butter to top and blend together until consistency resembles cornmeal.  Gradually fold the wet ingredients into the dry.
The dough will be very thick.
On a well-floured surface, flatten and form the dough into a 12″ x 4″ x 1″ thick rectangle.
Using a sharp knife, divide the dough into three equal pieces.
Slice each piece into an X shape, resulting in four triangles... 12 total (you can tell by looking at mine that my measurements were off).


 So you will end up with 3 squares, cut like this, side by side.  (Sorry, didn't think to take an actual picture of the dough at this step.  You can see the pictures from the original post here.)


Place your triangles on baking sheet and bake for 15 minutes or until golden brown.
Remove from oven and transfer to a cooling rack.


Cream Cheese Glaze
  • 1 cup plus 1 tablespoon powdered sugar
  • 2 TBSP milk (plus extra to thin down)
  • 4 oz cream cheese
Mix the powdered sugar and milk together.  Add the cream cheese and beat until smooth, adding additional milk (1 TBSP at a time) until you reach the right consistency.  It should be fairly thin, but not runny.  Brush onto scones with a pastry brush.  Let dry for about 10 minutes

Spiced Glaze
  • 1 cup plus 3 TBSP powdered sugar
  • 2 TBSP milk
  • 1/4 tsp ground cinnamon
  • 1/8 tsp ground nutmeg
  • Pinch of ground ginger
  • Pinch of ground cloves
Combine all of the ingredients for the spiced glaze and drizzle on top of scones.


I encourage you to try this... they are so good!! 

So grab yourself a cup of coffee (or if you're like me a Diet Dr. Pepper) and ENJOY!!

Saturday, November 2, 2013

Wedding Invitation Ornament - take 2


Another wedding, another ornament!  :)  
This is the second wedding invitation ornament  that I've made.  See my original "how to" here


 Front
This invitation had a band that held all the different pieces of the invitation together.   A portion of this band made a perfect tag for the ornament as it had their initials and wedding date.

Back
Note the personalized details.

I hope the couple enjoys their wedding keepsake!


Sunday, October 27, 2013

Homemade Taco Seasoning


Once again, Pinterest has inspired me to make something that I would not have otherwise thought to make...  Taco Seasoning.  There were many different options for the recipe, but the one that I used can be found here.  Rather than having to buy the individual packets, some that have ingredients that difficult to swallow (or pronounce), it will be nice to have it on hand for when the tex-mex cravings strike!  Another advantage is you can adjust the ingredients to suit your individual taste, or spice preference.

To make this recipe you will need:

1 Cup Chili Powder
1/2 Cup Cumin
1/4 Cup Onion Powder
1/4 Cup Oregano
2 Tablespoons Garlic Powder
2 Tablespoons Paprika
2 Tablespoons Crushed Red Pepper Flakes  
1 Tablespoon Sea Salt
a few dashes of Cayenne pepper 

(you can adjust the amount of red pepper flakes and/or cayenne pepper if you like more heat!)


Put all the ingredients in a mason jar and shake! 
It's that easy!!  :)

It's kinda pretty, dontcha think??


I then packaged them in smaller jars for gifts.  Oh, and one for me! :)


The labels and hang tags were purchased from My Own Labels.  I love these labels and think they add just the right finishing touch. 

I encourage you to try this, I believe you just might like it!   

Olé!!


Wednesday, September 4, 2013

Another Wedding Keepsake


Wedding Bouquet Ornaments

You've been asked to stand by your friend's side on her special day, what greater honor?  You've been there for the ceremony and vows, and you've partied at the reception.  You've had the time of your life.  The next day, what do you have to remember the special occasion (besides the pictures and memories)?  Perhaps a hangover, a wrinkled dress, a disheveled hair style, and your beautiful flowers.  The bouquet will not look great forever, so why not try to preserve it... somewhat... and use the use some parts to make an ornament?!  Both of my daughters were in their friend's wedding and I decided to try and save their bouquets.
First I hung the bouquets upside down to dry them out as much as possible.  Then I took it apart and added some of the elements, petals and buds to a glass Christmas ornament.  For the roses, I removed several of the outer petals until I was able to *squish* the remaining rose into the opening of the ornament.


As I did in the Wedding Invitation Ornament, I included the beads on the filament to add interest and another dimension to the ornament.  Again, I used the eraser end of a pencil to move the elements around to my liking.   Once the ornament was full, to complete the project, I added a coordinating bow that was similar to their dress color.  


I don't know how this will hold up, the flower may dry out even more and crumble and fall to the bottom of the ornament, but I'm hoping for the best!!  Stay tuned...

So, my hope is, when the dress no longer fits and is out of style and when other weddings, babies and other life events put time and distance between this wedding they will always have this ornament and every Christmas will be reminded of this special occasion and their friend!


btw... the pictures honestly don't these justice.  They are really very pretty!

Tuesday, September 3, 2013

Wedding Invitation Ornament


A wedding, a marriage, a lifetime of happiness and a keepsake!

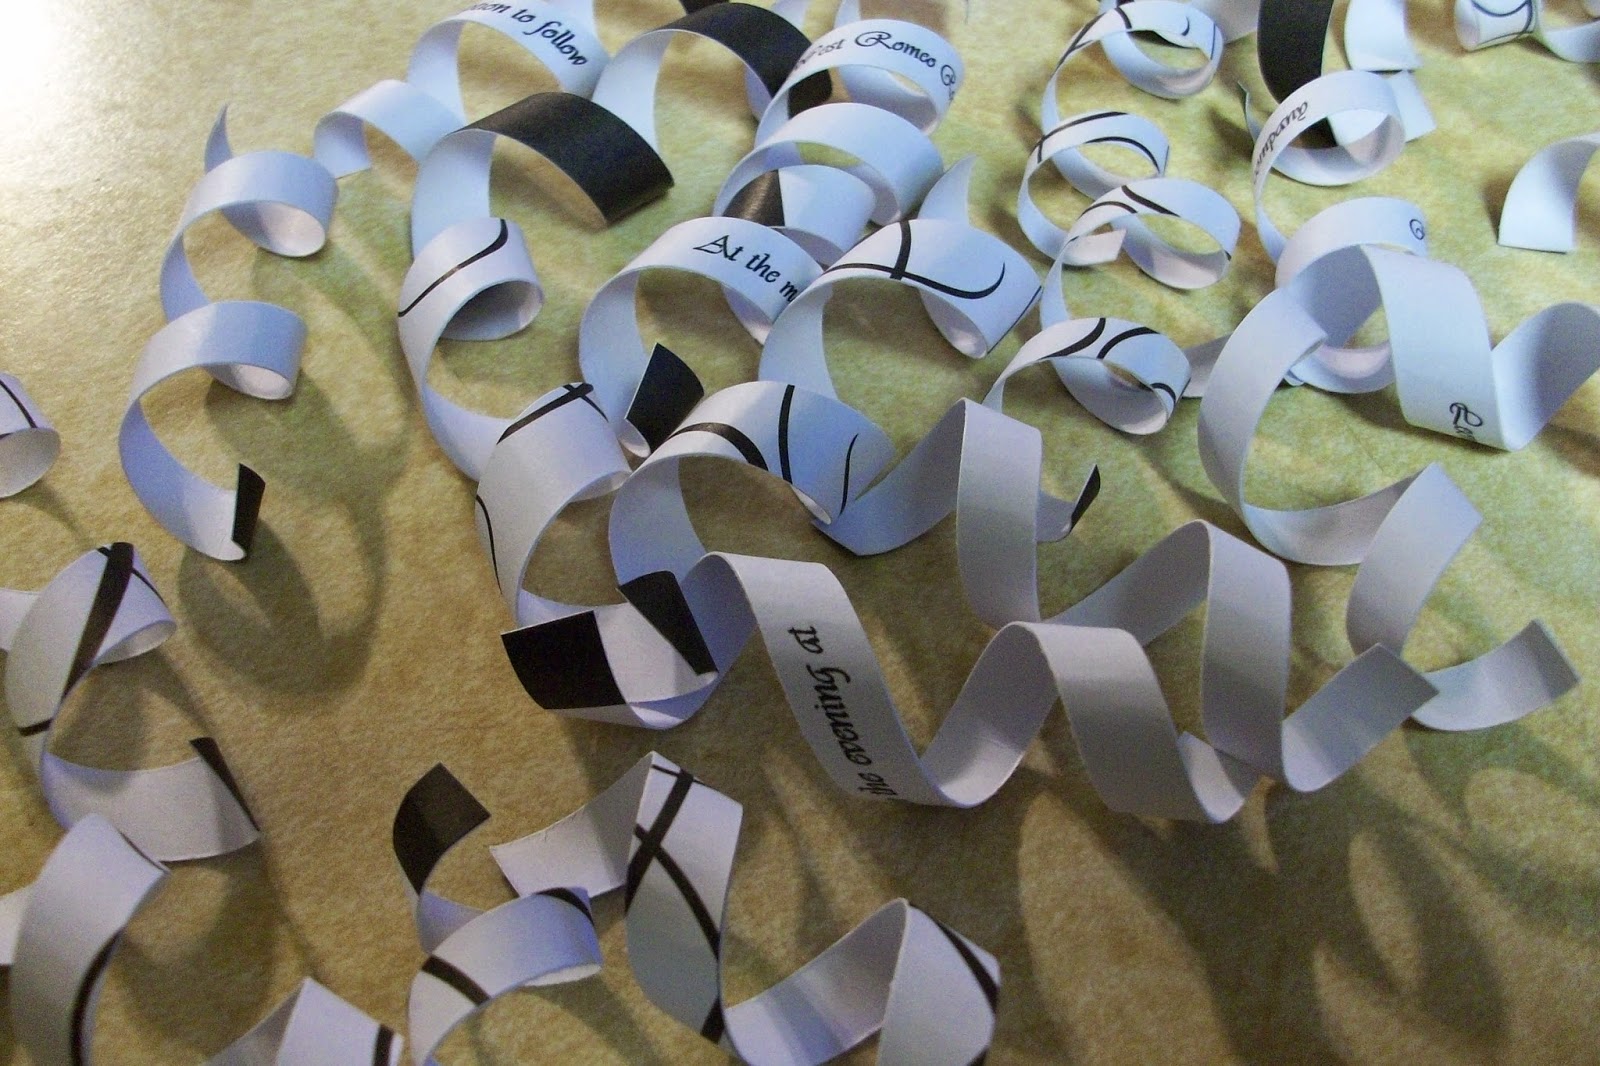
When I had seen this gift idea here I knew that I wanted to try recreating it!  Once I had received the invitation in the mail I took care to make sure that it stayed pristine and even took my daughters invitation as well so I would have a back-up, you know... just in case!!  I then cut the invitation into strips making sure the lines of text were centered on the strips.  I didn't bother to measure and in fact used varying widths.  Other necessities would include a glass Christmas ball, I used a 4" diameter ornament for mine, and any other items desired to embellish the ornament.


I found these in the floral section at Michaels.  I'm not sure what you call them, but I loved the glass beads on the filament and thought that would add some interest as well as pick up the lights from the tree.  I also felt that these would be better than loose beads which would fall to the bottom of the ornament.


Coordinating ribbon was all that was left to finish off this project. 


I then used a pencil to curl the strips of the invitation.


The strips were then dropped into the ornament along with segments of the beads.  I used the eraser end of a pencil to gently move items around until I liked the way it looked... which could have been a moot point as I'm sure the items will shift and change position whenever the ornament is moved :).


This close up allows you to see that the beads as well as get 
a glimpse of the text on the strips of the invitation.

All that's left is to box it up and present the bride with her keepsake ornament!


Sunday, August 18, 2013

Two for One!

When life gives you lemons...  clean your microwave and garbage disposal!!  


I had seen several people post this suggestion on Pinterest and knew I would have to try it.  To tell the truth, I was skeptical as I have always dreaded cleaning the microwave.  It's always a caked on, tough to remove mess.  Not anymore.  I was completely amazed at how easy this was!  If you have a dirty microwave you really must try this!!  

All I did was juiced 2 lemons and cut up the remains and added to approximately 1 cup of water.  Heat in the microwave on high for 5 - 10 minutes (it only took 5 minutes for me).  Just enough to get the water with lemon to steam the inside of the microwave.

Next, just use a damp sponge and wipe out the mess.  It's that easy!!  No scrubbing needed.  It was a breeze!!  Honestly, I was blown away by how well this worked.


Last but not least, don't just toss your lemon remains in the trash, throw your lemon water and rinds down your garbage disposal to remove lingering odors.  I have to tell you, my hands and my kitchen smelled wonderfully clean and lemony!  :)


 Two jobs done for the price of two lemons.  Not bad!!


Sunday, June 9, 2013

Banana Muffins


I had several overripe bananas and promised myself that instead of just pitching them I would make something with them.  I found this Banana Muffin recipe on Pinterest and had to give it a try!

I found the recipe here.  
Here's what you'll need:  

Ingredients:
3 cups all-purpose flour
1 teaspoon baking soda
1 teaspoon salt
1/2 teaspoon baking powder
2 cups sugar
1 cup vegetable oil
3 large eggs
1 tablespoon vanilla extract
4 ripe bananas, peeled and coarsely mashed
Directions:
Line 18 muffin cups with paper liners. Preheat the oven to 325 degrees F.Whisk the flour, baking soda, salt, and baking powder in a medium bowl to blend. Beat the sugar, oil, eggs, and vanilla in a large bowl to blend. Stir in the banana. Add the dry ingredients and stir just until blended.
Divide the batter among the prepared muffin cups. Bake the muffins on the middle rack until the tops are golden brown and a tester inserted into the center comes out with no crumbs attached, about 25 minutes. Transfer the muffins to a rack and cool slightly.


Notes:  
~ I didn't have vegetable oil and used canola oil instead.  I suppose you can even substitute applesauce if you wish to be more health conscious.  
~ I also added approximately 2 - 2.5 tsp of cinnamon.  
~ I was able to get 24 muffins, instead of the 18 stated in the recipe, and could have probably had 2 more if I had another muffin pan.  I'm not sure why this happened unless the size of my 4 bananas was larger than what was used in the original recipe resulting making more batter.  Whatever the reason, I'm not complaining!  :)
~ After I filled one muffin pan I added mini chocolate chips to the remaining batter.  Mmmm...

These muffins are sooo good!  I think this recipe is a keeper!!

ENJOY!!